As promised in the "Soft Vintage Pink and White 1st Birthday Party" post, here is your
Gumpaste Tutorial:
{Here are a couple of other examples of other cakes that I have done using this fabulous flower.}

 Gumpaste Tutorial:
 Here's what you need:

1.A set of round cutters (close-up shown below) {or you can find concentric circular shapes around your house and use those as a template, cutting them out with an Exacto knife} 2.Cornstarch 3.Wilton Ready-to-Use Gumpaste {or mix} 4. 2 sizes of silver, metallic Dragees - close-up also shown below. (For the smaller size, I used the tiniest dragges that I could find!) 5.Wilton Piping Gel 6.Small rolling pin (again, from Wilton) 7.Tweezers 8.A fondant and gumpaste ball tool (2 are shown but you only need 1) 9. Thin foam pad (Wilton) 10.Wilton Practice board OR a ziploc baggie. 11. Small parchment paper bag filled with the said Piping gel. ;) Tutorial here {In the video, she cuts her triangle in half. I make mine even smaller by cutting it in half AGAIN to have more control of the bag}. *Food coloring is optional depending on what color you want your flowers. You just add it to your gumpaste and kneed it before beginning. ;)
 To Begin:
*Select the size cutters that you want. {I used every other size in my set and you can make this flower with as many layers as you want!!}
 *Get a boulder-sized {'boulder' as in way back in the day of playing marbles} ball of gumpaste.
 *With a super-thin coat of cornstarch on your mat (or surface; you really don't need the mat) and rolling pin, roll out your gumpaste as THIN as you can get it. I'm talking, PAPER THIN.
 * Cut out your circles and place them under the practice board (or ziploc baggie) to keep them from drying out.
 *Kneed the excess gumpaste and place it back in it's original bag.
 *Place the largest circle on your thin foam pad and place your ball tool half-way onto the foam and half-way onto the gumpaste.
 *Make sure you have a thin layer of cornstarch on your ball tool and with a fluid motion, rub tool around your gumpaste's edge to create the ruffled edge.
 *As you finish each circle, use your piping bag to adhere each circle to the next.
 *To make the Dragge center, place a (very small) pea-sized drop of piping gel in the center of your smallest flower.
 *With your tweezers, place a large dragge in the center of the piping gel drop.
 * Through trial and error, I have found that the easiest way to place the teeny-tiny dragess in place is to pour a few around the center dragee...
 *...then sort them with your tweezers.
 *Let the flower dry at least 8 hours before assembling them on the cake {or cupcake! They make SUPER cute cupcake toppers!}.
 Happy baking, everyone!
 *Place the largest circle on your thin foam pad and place your ball tool half-way onto the foam and half-way onto the gumpaste.
 *Make sure you have a thin layer of cornstarch on your ball tool and with a fluid motion, rub tool around your gumpaste's edge to create the ruffled edge.
 *As you finish each circle, use your piping bag to adhere each circle to the next.
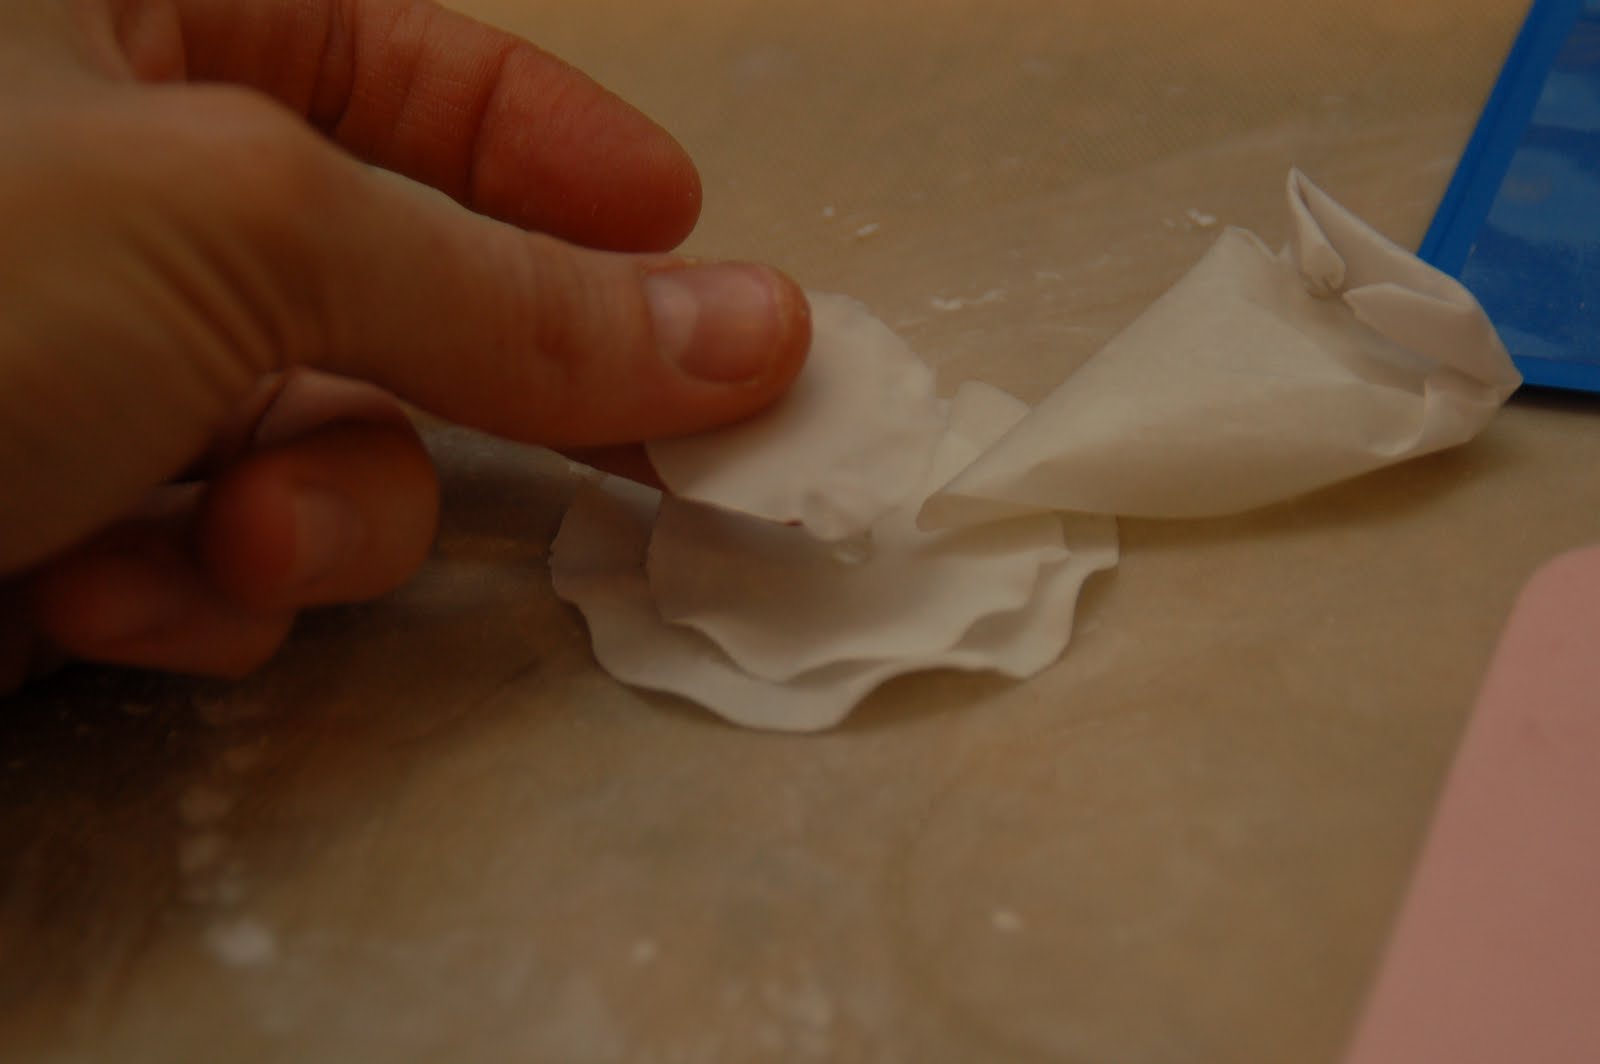 *To make the Dragge center, place a (very small) pea-sized drop of piping gel in the center of your smallest flower.
 *With your tweezers, place a large dragge in the center of the piping gel drop.
 * Through trial and error, I have found that the easiest way to place the teeny-tiny dragess in place is to pour a few around the center dragee...
 *...then sort them with your tweezers.
 *Let the flower dry at least 8 hours before assembling them on the cake {or cupcake! They make SUPER cute cupcake toppers!}.
 Happy baking, everyone!
4 comments:
This cake is beautiful and thank you for the tutorial.
Great Tutorial! Congrats on your features too. I am dying to know how you did that ribboning technique on your pink cake, I've never seen it before.
Thanks dotdot and Kaitlyn! There is a tutorial link for the ruffle technique on the first cake on this post:http://tomseth.blogspot.com/2011/04/par-tay.html ! Enjoy!
Hi there, I just love the top cake!!! But how do you add the flowers to the ruffled buttercram? Do you just use a toothpick? Or just slap them right onto the soft buttercream?
Post a Comment